


 Giving your furniture a makeover is an easy and affordable way to personalize your space and give vintage pieces an upgrade. Check out the Better Homes and Gardens DIY ideas below for inspiration:
Reupholster: Give your favorite chair a new look with fun, fresh fabric. Make sure you have needle-nose pliers, a staple gun, welt cord, sewing machine and tack strips and follow the step-by-step instructions here.
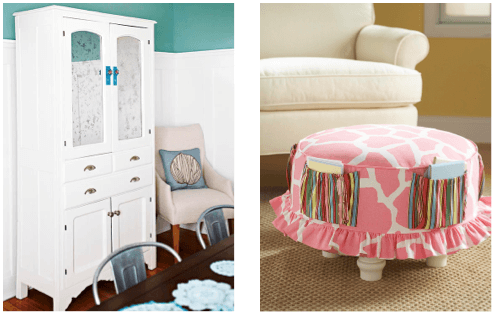
Paint: A fresh coat of paint can give an old-fashioned piece a chic and modern appearance. Consider using a bright color such as turquoise for a bold look and use a paint pen to add a pattern for even more interest. To complete it, you’ll need painter’s tape, sandpaper, paintbrushes, latex or oil-based paint and primer. See here for more detailed instructions.
Embellishments: Personalize your furniture with fun embellishments by adding new drawer knobs, cabinet handles, and mirrors or painting designs. If your not comfortable with your artistic abilities use a stencil to paint on a pattern that suits your style.
Ottoman Slipcover: Revamp a worn out ottoman and add some color to your space with a bright slipcover. To make one like the slipcover above, cut a circle of fabric for the top and a strip for the drop, the stick covered piping along the top seam of the drop and a gathered ruffle at the bottom. Add pockets made from contrasting fabric, inserting elastic into the top hem. Screw painted legs to the bottom of your ottoman and slip your new cover over. See here for more detailed instructions.
Recycled Home Décor
Decorating with recycled materials is not only a creative way of furnishing your home, but it is also a great way to be green and eco-friendly. By reusing materials, you are contributing to the health of the environment by eliminating waste. Here are some unique ideas on how to transform no longer needed items into innovative décor pieces.

– Do you ever notice how your pets want to tag along when you’re packing to leave town? Disguise an old suitcase as a pet bed with some fabric, chair legs, and cushion. A neat aspect of this piece is that you probably already own each material component. Find an old chair or coffee table and saw off the legs. For the cushion, an old pillow and case will suffice, but if you’re feeling fancy, feel free to purchase a foam pad and cut it to the appropriate size.
– Isn’t it frustrating when your silverware gets old and bent up? Instead of throwing them away, turn them into one-of-a-kind pieces for your home. From coat/key hooks to mini trinkets, there is so much freedom for creativity when converting silverware into unique home items.
Bring the Outdoors In with House Plant Decor
Spruce up your home with a little greenery. Check out Real Simple’s tips for decorating with houseplants:
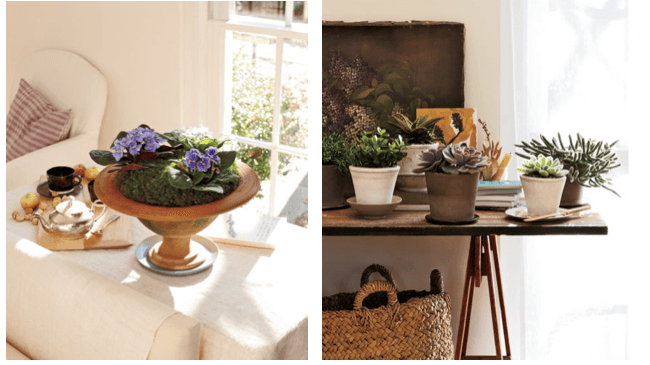
African Violets: In an urn, combine three shades of African violets and cover the soil with sheet moss to give it a cozy feel and help hold in moisture. Place the flowers where they will receive direct morning light and protection from bright afternoon sun. To water the flowers, lift the moss so you can soak the oil and keep the soil moist at all times.
Succulents: Succulents and mini cacti are extremely easy to care for and give your space a more interesting feel. We recommend mixing plants such as mistletoe cactus, jade, aloe, echeveria and rattail cactus in two types of neutral pots. Keep the plants in direct light and make sure the solid dries thoroughly between watering.
Soak up the sun with modern Wicker outdoor furniture sets from sectionals to dining tables to benches.
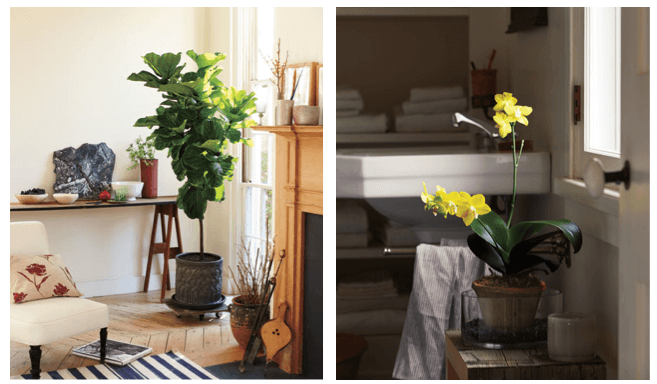
Fiddle-Leaf Fig: The large trees on the fiddle-leaf fig are great for adding color and life to bland, empty spaces. We recommend placing it on a wheeled caddie for easy mobility. A dark, cylindrical pot creates a modern appearance and keeps the focus on the fig tree. The tree requires moderate sunlight, so keep it away from bright afternoon sun. Once the top inch of soil dries out, water it thoroughly.
Orchid: Orchids do best in light and humidity, making them ideal for a sunny bathroom. The orchid stays bloomed for a month or so. Set the pot on gravel in a low glass cylinder to help trap moisture—as the water evaporates, it will be caught by the glass and reabsorbed by the orchid. Make sure the flower receives direct morning light and keep it away from the afternoon sun. Allow the top half-inch of medium to dry out before watering again.
Do-It-Yourself Leaf Crafts
Arts and crafts projects are great activities for parents to do with children. It’s a great way for parents to spend quality time with kids while teaching them developmental skills like concentration and much more. With Thanksgiving right around the corner, why not create craft projects that can double as decorations? Here are some easy and creative DIY ideas for making art pieces with fall leaves!
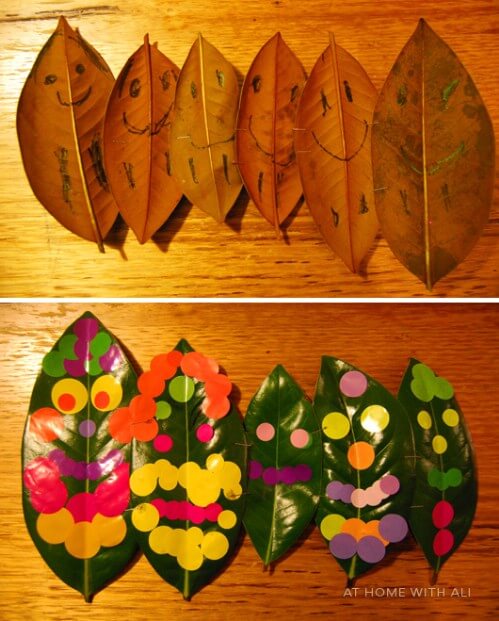 Image Credit: DIY & Crafts (diyncrafts.com)
Mason Jar Lantern: Create a table lantern with some mason jars, mod podge and fall leaves. You can either choose from leaves in your yard or purchase some from the local craft store. It’s as easy as simply painting the leaves onto the jar with mod podge and leaving it to dry. Then, place a small candle inside and light it for a beautiful glowing lantern. This would add a nice subtle touch to any Thanksgiving dinner table!
Wreath: Make an autumn wreath for your front door with just cardboard, glue and leaves! Cut out a large “O” for your children to use as a template for gluing all the leaves. For more creativity, have kids add some acorns, pinecones, and other fall materials. There are many different types of crafting glue to choose from, but hot glue guns will help secure heavier pieces best. Last, tie a ribbon to the top of the wreath and hang on your front door with a hook. What a beautiful entrance for your guest to be greeted with!
Clay Bowls: Have your kids make festive bowls for table décor. Purchase some molding craft clay and gather a few leaves from the yard for this very simple project. Roll out your clay on a flat surface, and then imprint the leaves’ designs into the clay by pressing them into the clay and then peel them off. Once this is done, place the clay inside a bowl and leave it overnight to dry. When the clay is hardened, remove from the bowl and paint with any craft paint. Use the bowl of mints or other candy and leave it on a table for guests.

DIY Mason Jar Projects
Mason jars have become a super trendy home décor item. From rustic to super chic, there are so many different themes that they can be catered to. Here are some do-it-yourself crafting projects you can use mason jars for.
Vases: Mason jars can be easily transformed into vases. You can keep them clear and dress them up with vibrant ribbons and flowers or paint them any color you’d like. There is so much room to play with colors. Since mason jars are clear, you can pretty much design them in any way to match different themes of rooms or events.
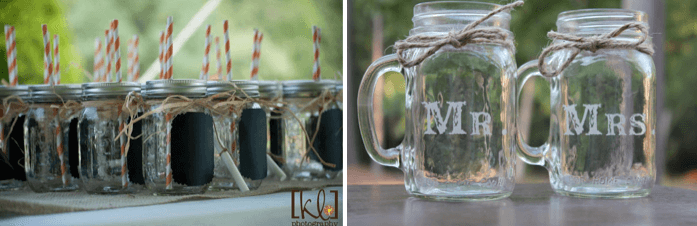
Beverages: There are many ways that mason jars can be used for beverages. You can purchase some chalk paint from a local craft or paint store and paint one side of the jar. Tie ribbon or any string around the top of the jar and securing a piece of chalk with it allows people to write their names on the jar. Also, you can make or order vinyl stickers and label jars to make them look customized for the owner of the mug. You can choose to use a lid and poke a hole in it for a straw, which is great for spills, or to leaves the lid off.
Lights: Transforming mason jars into lights is a very popular crafting project. From candles to bulbs, you can craft them to place indoors or outdoors. Adding items like lace or spray-painting designs are creative ways to add stencil features that make light shine in different ways.
Study For Success: Creating the Ultimate Homework Space
Having a good study environment is important for students of all ages. Transform your homework space into a study oasis with the tips below:
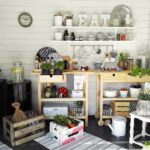
Organization: If you have several family members using the study space, keeping everyone’s stuff organized is essential. Consider using file totes, file cabinets or Pottery Barn wall organization systems to sort out everyone’s documents. Adding a bulletin board or dry erase board to space is a convenient way to post helpful reminders, grades, and to-do lists.
Storage: Shelves are perfect for storing school and office supplies—put storage bins on the bottom shelves so your kids can access the supplies stored in them on their own. Make sure everything is labeled for quick and easy access.
Furniture: Not all studying has to take place at a desk. Include unique and comfortable seating options like a bean bag for an alternate place to get work done. Also, portable laptop desks provide a nice writing surface no matter where your kids are studying.
DIY Decorative Pillows
Throw pillows are a fun and affordable way to add some flair to your home. Customize them to fit your style with the ideas below we spotted on BHG:
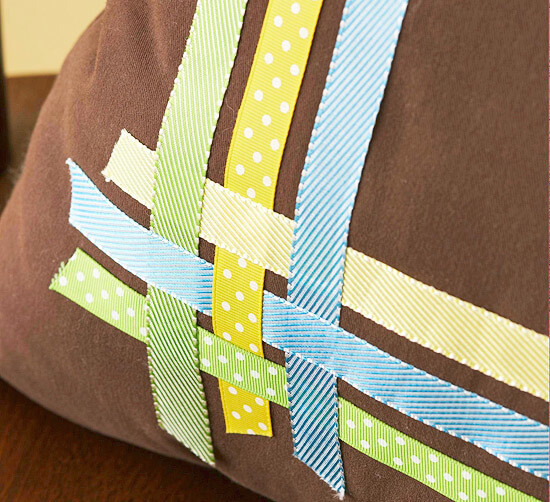
Overlapping Ribbon Pillow: The overlapping ribbon pillow is a quick way to add a design to your throw pillow. Simply cut the lengths of ribbon to fit the front panel of a pillow and attach them with iron-on adhesive in a lace pattern. Add interest to varying lengths and colors of ribbons. Cut ends of ribbons at the angle and use a fray check to keep ribbon ends neatly.
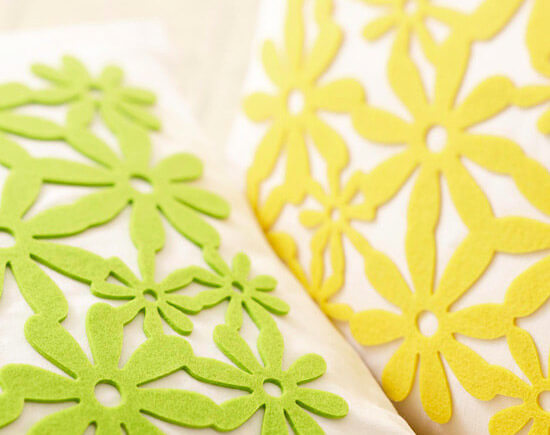
Die-Cut Felt Pattern Pillow: Re-create expensive designer looks by dressing up plain cotton pillows – simply attach die-cut felt place mats using fabric glue.
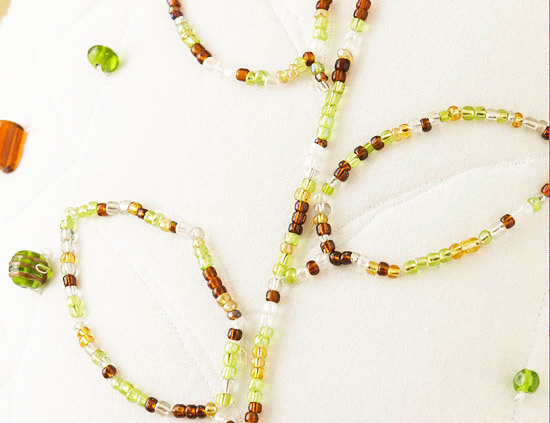
Beaded Leaf Pillow: Add class by accenting an existing design on your pillow with seed beads. Instead of sewing on individual beads, string a dozen or so on a length of thread and stitch them in place. Make sure to loop the thread through each bead several times to secure it.
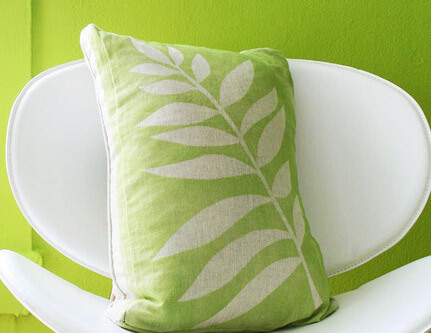
Spray-Paint Leaf Pillow: Start with a beige or cream-color linen or cotton pillow. Open a seam and remove the pillow form to work with the pillow on a flat surface. Create a large foliage stencil from contact paper and attach it to the fabric using tape or straight pins – tape off the edges for straight, tidy lines. Spray bright green fabric paint over the stencil and once it’s dry remove the stencil. Replace the pillow form and stitch the seam closed.