


I like to find any excuse to cover things in the beautiful patterned paper. Wallpaper is gorgeous but too expensive for craft purposes. So when I’m looking to bring some pattern into my home, I like to use gift wrap. One sheet is just enough for a small project.
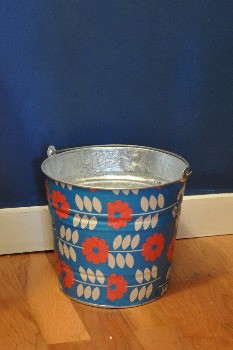
With so many modern gifts wraps available now, it’s easy to think of ways to decorate with these designs. With paper and Mod Podge, the most mundane object can be made over into a custom accessory that suits your style. Here, I transformed a metal bucket from my hardware store into a chic wastebasket that’s perfect for a home office.
Tools & Supplies
- Metal pail. Even an empty paint can work
- Mod Podge in the matte finish
- A sheet of gift wrap. For the project, I used NineteenSeventyThree wrapping paper from my local Blick art store. I suggest a matte gift wrap with a small pattern that doesn’t need to be painstakingly matched up.
- Foam brush
- Scissors
- Ruler and pencil
- X-acto knife
Instructions
1. Measure the gift wrap to wrap around the pail. Most likely, you’ll be working with a pail that is tapered (like the one above), rather than a perfect cylinder. Cylinders are easy to cover, as you can use one piece to wrap around evenly. Because I was working with a tapered pail, I had to cut the paper into three separate pieces. This way, I could cover the outside of the pail in layers to ensure a seamless result. When measuring, make sure each piece is a couple of inches wider than the height of the pail; that will make it much easier to layer the paper around the pail.
2. Lay out your pieces of paper over the pail to make sure they’ll fit around and cover the entire outside surface of the pail. You should notice paper overhang in some spots; this is normal. You’ll snip it off later.
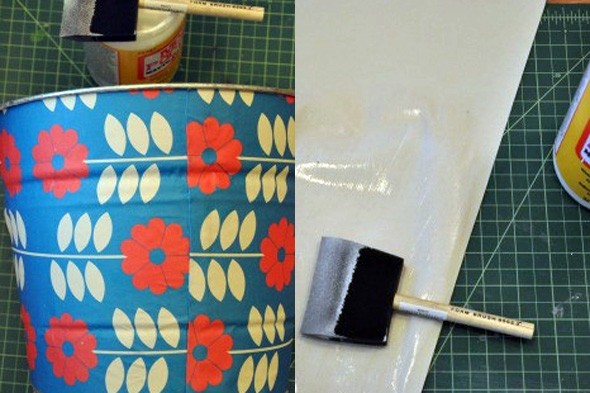
3. Take your first piece of paper and apply an even coat of Mod Podge with a foam brush.

Make sure to cover the back of the paper entirely. Press the sheet onto your pail and start smoothing down the paper to push out any air bubbles. This is the trickiest part, especially if your pail has any grooves like mine did. Start on one end and slowly move across, pressing into the grooves and running your hand across the paper to smooth it out. You can also use a wallpaper brush to help smooth out the paper.
4. Run the X-acto knife along the lip of the bucket to cut off any paper overhang.
5. Once your pail is completely covered, let it set and dry for about 15 minutes.
6. Mod Podge works as glue and a sealer. With your foam brush, apply a thin coat of Mod Podge over your covered pail to seal the paper. Let dry for 30 minutes. Apply a second coat and let dry.
You’ll see that Mod Podge works wonders, and if it weren’t a part of your crafting kit before, it would be now. And that’s how you turn a basic bucket from the hardware store into an eye-catching wastebasket you won’t want to hide behind a cabinet door.